Tuesday, December 18, 2012
Family and flies
Sunday, March 27, 2011
A few flies from today and the '50 Followers Giveaway' winner!
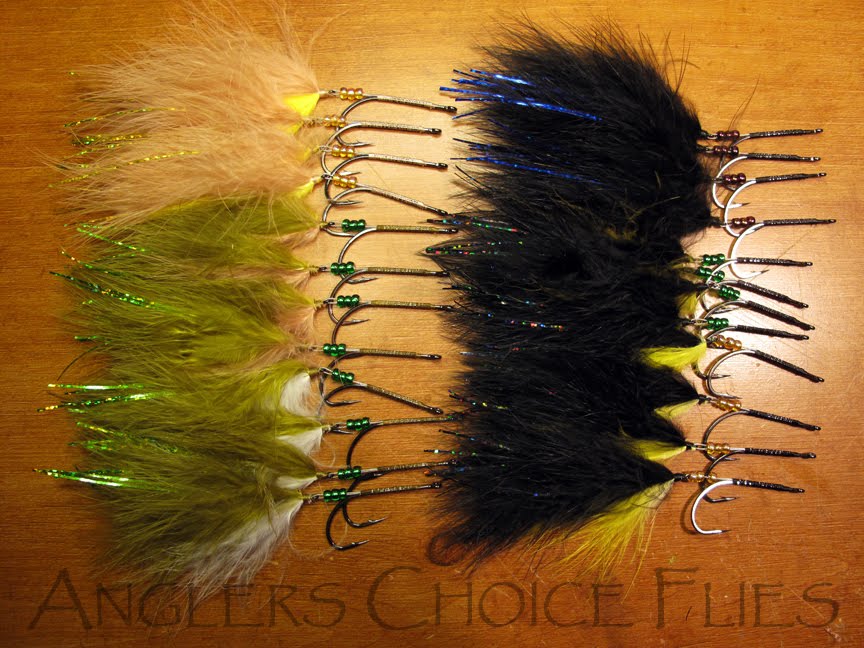
After a full day on the water on Saturday I had to dig in today to get some tying knocked out. Orders are packed up and ready to hit the mail in the morning to Michigan, Pennsylvania, Wyoming, New Mexico, Oregon and California! Above are a few of the flies tied up today; Red Rocket, Voodoo Squatch, Robinsons Munchable Minnow and Meal Ticket. www.anglerschoiceflies.com
Sunday, March 13, 2011
Midwest Fly Fishing Show 2011
Made it back from the 2011 Midwest Fly Fishing Show in decent time yesterday. The show this year was excellent as usual and as busy as I have ever seen it. Saturday was a mad house...the gate was rumored to be over 2300! Patrick Kelly drove up with me this year and we split a booth. For those that don't know Pat he is a shop guy over at Mad River Outfitters and ties big predator flies for his company Apex Fly Co. He does not have a site up just yet but is a primary participant on the blog Fly Fishing for Muskie. If you have not seen his flies then do yourself a favor and check them out...they are the sickest of the sick when it comes to musky gear! Let's just say that the guy has the fish fever as bad as any I have ever seen; you can not help but get excited with him when talking fish and flies.I personally had a great time at the show as I got to see the whole crew of Michigan guys throughout the weekend. It is always fun to catch up with shops and guides to see how the streamers I sent up have been doing for them over the last year and get things lined up for this year. For this show I borrowed a swim tank, created by Tony DiBenedetto Jr of Tube Fly Tech, to be able to give people a fish eye view of what the articulated streamers do under the water. It was a fantastic tool to show people how the hydrodynamics surrounding a meaty head really make the fly dance. It was also really entertaining to watch people walking down the aisle looking around and just stop dead in their tracks when they saw a pair of five inch articulated flies 'swimming' in the tank; it made starting conversation around the flies very easy.
Production tying at a show is always a challenging proposition as you should be spending most of your time as a tier talking to show attendees and demonstrating techniques that you are working on. I was though able to work in the finishing touches on the Voodoo Squatches that I posted a few days ago as well as tying more for people at the show. Once they saw these in the tank it was hard to keep them on the table. This particular batch will be terrorizing fish out in Connecticut at some point in the near future.The one thing I was looking for at the show was a good tube fly box...and I found two. I had seen the fantastic boxes from Bob at Great Lakes Spey Shop and was determined to pick them up. They use a super easy pin and magnet system, and there are no weak spots or pieces to break! While over at his table I found two absolutely grade A+ patches of Temple Dog that needed to be bought, so they were and will be gracing flies for me this tying season. I did manage to take some time at the very end of the show yesterday to use that Temple Dog to tie a smelt pattern on a Pro FlyTyer tube.
Now that show season is over for me I can finally get all my gear back in the correct bins and really buckle down to hammer on some flies, and open up some time on the water. Things around the Midwest are starting to really heat up so there are fish that need caught.
Now...time to fill out some brackets!
-mike schmidt
http://www.anglerschoiceflies.com/
Thursday, March 10, 2011
SQUATCH!!! to be continued...
Hammered out some orders and got packed up for the Midwest Fly Fishing Expo, then got some Voodoo Squatchs in progress. Articulation points are all set and I am spent... Time to hit the sack for some shut eye as the next few nights in Detroit Rock City won't likely allow for much sleep.-mike schmidt
www.anglerschoiceflies.com
Tuesday, March 1, 2011
A few flies from tonight...03.01.2011
OK...so maybe it was the last few nights.As bad as I want to keep this batch of flies, this order is headed to northern Michigan in the morning and I am off to bed early tonight. Tomorrow I will get going on the next set and have week three of the advanced tying class at Mad River Outfitters.
Today we hit 25 followers, so we are half way to some free flies out the door...
-mike schmidt
http://www.anglerschoiceflies.com/
Monday, February 21, 2011
Step by step: Mike's Voodoo Squatch
Thread: UTC140 denier, tan
Hook1: Gamagatsu B10S size 2/0
Hook2: Daiichi 2141 size 1
Tail: Matabou, tan
Body1: Marabou, tan and yellow
Body2: Bucktail, tan and yellow
Flash: Magnum Holographic Flashabou, yellow
Head: Senyo Laser Dub, rusty bronze and dark tan
Eyes: 3D Epoxy, Super Pearl 1/2"
Connection: Beadalon, 19 strand .018"
Alternative color combinations: All black, olive over tan, green over orange, red over white
STEP 1: With your Daiichi 2141 size 1 in the vise get your thread started and wrapped to the back of the hook shank. Once at the rear tie in point, located above the midpoint of the hook spear, tie a single marabou feather hanging approximately one hook length off the back of the hook. Tightly wrap the material forward about two thirds of the hook shank then return your thread to the mid-point of the shank.
STEP 2: Tie in three strands of Holographic Flashabou in the middle of the strands then fold them back over and tie them securely down, resulting in six strands hanging off the back of the hook. Tying the Flashabou in by the middle prevents the material from slipping out. The Holographic flashabou should be trimmed to be approximately the length of the marabou tail.
STEP 3: Advance your thread forward towards the eye. About one eye width back on the shank tie in a single tan marabou feather on top of the hook shank and one yellow below. The feathers should be tied in so that the tips taper down towards the tail. Once tied in go ahead and cut off the butt ends of the marabou and create a smooth thread head.
STEP 4: Place the Gamagatsu B10S size 2/0 in the vise and attach the rear hook using Beadalon. For this fly it will be approximately three inches of 19 strand .018" Beadalon threaded through the eye of the rear hook and use three size E glass beads to keep the loop closed. Tie under maximum pressure from the rear to the front and back, then tie the fly. If done under maximum pressure with good coverage no further action is needed to secure the hooks.
STEP 5: About half way forward on the front hook shank tie in a single tan marabou feather on top of the hook shank and one yellow below. The feathers should be tied in so that the tips taper down about mid way through the marabou on the back hook. Tying the feathers in like this give the fly a nice tapered profile.
STEP 6: Again tie in three strands of Holographic Flashabou in the middle of the strands then fold them back over and tie them securely down, resulting in six strands hanging off the back of the hook. The Holographic flashabou on the front hook should be trimmed to taper out at about the same point as the marabou on the front hook.
STEP 7: This step involves reverse tying bucktail. Tie in a clump of tan bucktail on top of the hook shank and a clump of yellow below the hook shank, both with the tips out past the hook eye. Add a few extra tight binding wraps then reverse the hair backwards, easily done with an empty pen tube slid over the eye, and wrap down with eight to ten tight wraps.
STEP 8: Directly on top of the bucktail wraps tie in a clump of Rusty Bronze by the mid point and reverse it back over itself and brush out. Tying in the clumps here gives a nice gill effect but more importantly it serves to add some structure for the rest of the head. This stepp builds up the 'under head' so that there is a nice transition from the Laser Dub head back in to the body...maintaining a profile without gaps.
STEP 9: The head will consist of two clumps of senter tied Tan Senyo Laser Dub. Pull out a clump and work it with your fingers so that the fibers go generally the same direction. Push the clump directly over the eye of the hook then use a pair of tight wraps in the middle of the material to hold it in place. Then fold the material back over itself and secure with a few more wraps in front of it.
STEP 10: Tie in a second clump of the tan Senyo Laser Dub just behind the eye in the same manner as step9 then whip finish. These clumps should be fairly bulky as they are meant to push around enough water to really get the back of the fly doing a jig!
STEP 11: Use Loctite Gel, or similar gel glue, to apply a 1/2" 3D Epoxy eye to each side of the fly about an eye width back. Make sure to hold the eyes in place until you can feel them heating up, indicating that the chemical reaction that bonds the back of the eye to the material has taken place.
At about five and a half inches this is a fairly meaty fly. I generally fish this fly on a 6WT throwing 200gr SA Streamer Express Long. Hard jerk strips make this fly practically dance through a retrieve.
Maintaining a wet width of three quarters of an inch gives this fly a great profile from any angle.Thursday, February 17, 2011
A few flies from the last two nights

I've been busier than a one legged man in an ass kicking contest knocking out flies lately. Here's a bunch of Red Rockets, Voodoo Squatch, Meal Tickets, Conrad Sculpins, and a few other assorted goodies ready to hit the mail tomorrow. Canada, Kentucky, New York, and Arkansas...so quite literally the four corners of the compass!